Can You Use a Laptop Hard Drive In A Desktop
For whatever reason you might find yourself wondering, can you use a laptop hard drive in a desktop computer. The answer is, you can and it’s pretty easy to do, provided the hard drive is not soldered to the motherboard.
Last Updated: January 11th, 2022
By: Steve
Contents
For whatever reason you might find yourself wondering, can you use a laptop hard drive in a desktop computer. The answer is, you can and it’s pretty easy to do, provided the hard drive is not soldered to the motherboard.
Some laptops are sold with what is called eMMC hard drives. These are usually your budget laptops, some Chromebooks and lower end machines. An eMMC drive is almost always a part of the laptops motherboard and is soldered in place. These laptop drives cannot be used in a desktop computer since you’d likely damage them when unsoldering them and there’s no way to interface them to the alternative computer in any case.
The rest of this post therefore relates only to those laptop hard drives which are separate (discrete) from the motherboard in the laptop. Such devices are usually 2.5 inches wide and feature a SATA interface, although lately some might feature an NVMe interface. Don’t worry if you don’t know what that means – we’ll go over that in more detail below. Older laptops may have an IDE interface. Much of the information below will still be the same, but you will need to use an IDE cable or adapter instead.
Why Might You Want To Use a Laptop Hard Drive In A Desktop Machine?
Many people choose to store their important information on a laptop, which is a portable device. Any laptop can become broken due to its small size and portability (for instance, fall and crash). In this scenario, there is a very strong possibility that the laptop’s hard drive will remain fully functional, allowing all of the data to be accessed and, if necessary, the laptop to be effectively used in the future.
If you’re going to send your laptop away for repair and are concerned about the privacy implications of sending the laptop disk away too, you may want to backup your data first onto the desktop computer then erase the laptop’s drive before sending it off.
Installing a laptop hard drive inside a system unit case or using the USB connector are two options for connecting a laptop hard drive to a desktop computer. In this article, we will go over all possibilities with you and explain how you can use a laptop hard drive on a desktop computer.
Is My Laptop Drive SATA, IDE or even M.2 NVMe?
In order to tell whether your laptop hard drive is SATA, IDE or NVMe you need to investigate the way the drive looks when it is detached from the laptop. We’ll start with an NVMe drive because they’re the most obviously different drive. Your laptop almost certainly won’t have an NVMe drive unless it’s a high end laptop and built sometime after about 2017. Apple introduced NVMe drives to their MacBook Pros in early 2016.
Nevertheless, if you drive looks a little like a wafer as pictured below, it’s an NVMe drive. To make matters more difficult it could feature a mSATA interface, or an NVMe interface. Determining which is beyond the scope of this post (though we’ll write another for you later) so you might need to do a quick Google search to find out how to put your NVMe drive into a desktop computer. For more information on which laptops support NVMe, have a look at Laptop Media’s compatibility chart.
NVMe Drive

An NVMe drive looks similar to the image to the left, which is a Crucial NVMe drive that will be extremely fast, but does require that your desktop computer has a spare NVMe slot. Clicking the image will take you to Amazon to browse more information.
SATA Drive
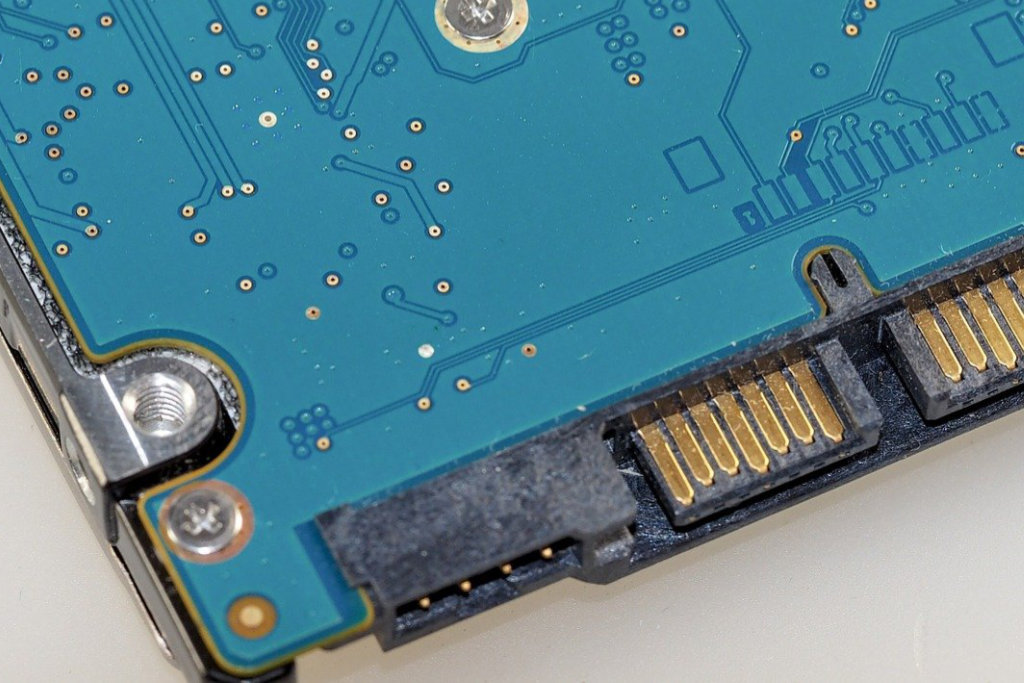
A SATA drive will have a connector or it that looks like the image to the right. Unless your laptop is really quite old it’ll almost certainly have a SATA drive rather than IDE.
These drives will connect to your laptop with a little plastic connector, often with a small cable attached. Notice how the gold connectors are quite flat and don’t protrude beyond the edge of the plastic on which they’re mounted. Indeed, notice they’re mounted on plastic. IDE connectors are small pins, which we’ll see below.
If the drive is reasonably heavy (around 100g) it’s probably a spinning drive. These can be quite slow. If you’re replacing the drive it’s worth the upgrade from spinning disks (also known as HDD) to an SSD. SSD stands for solid state drive.
IDE Drive
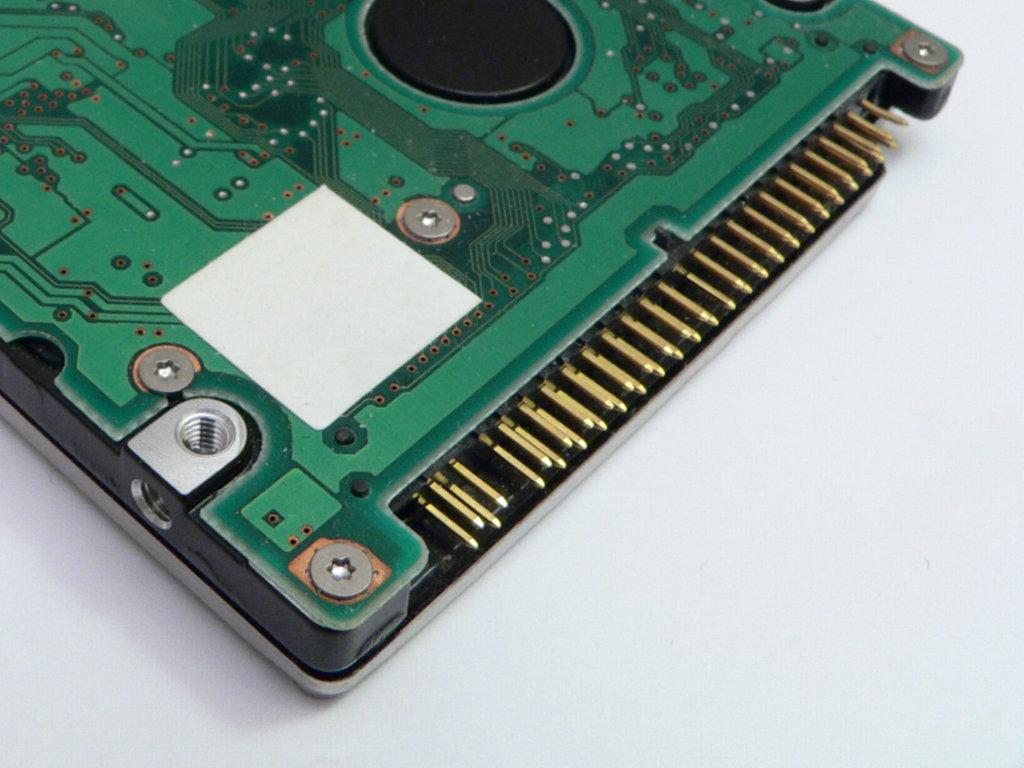
IDE Drives, also known as Parallel ATA are really quite rare nowadays as SATA has replaced them, so unless your laptop is very old it won’t have one of these.
Nevertheless, for the purposes of illustration, just in case your drive is old, notice how the connector is made up of lots of little pins arranged in a block. They’re spikey and quite unlike the SATA or NVMe connector so if your drive has a connector that looks like this one then you do indeed have an IDE connector. All is not lost – you can still buy IDE to USB converters to get your data off if you need to. We’ll go into that below.
How Can You Use A Laptop Hard Drive In A Desktop System Unit?
The hard drive in a laptop is almost identical to the hard drive in a desktop computer. Its size is the only significant difference. 3.5-inch hard drives are used in the desktop system units, while 2.5-inch hard drives are used in laptops to conserve space and power.
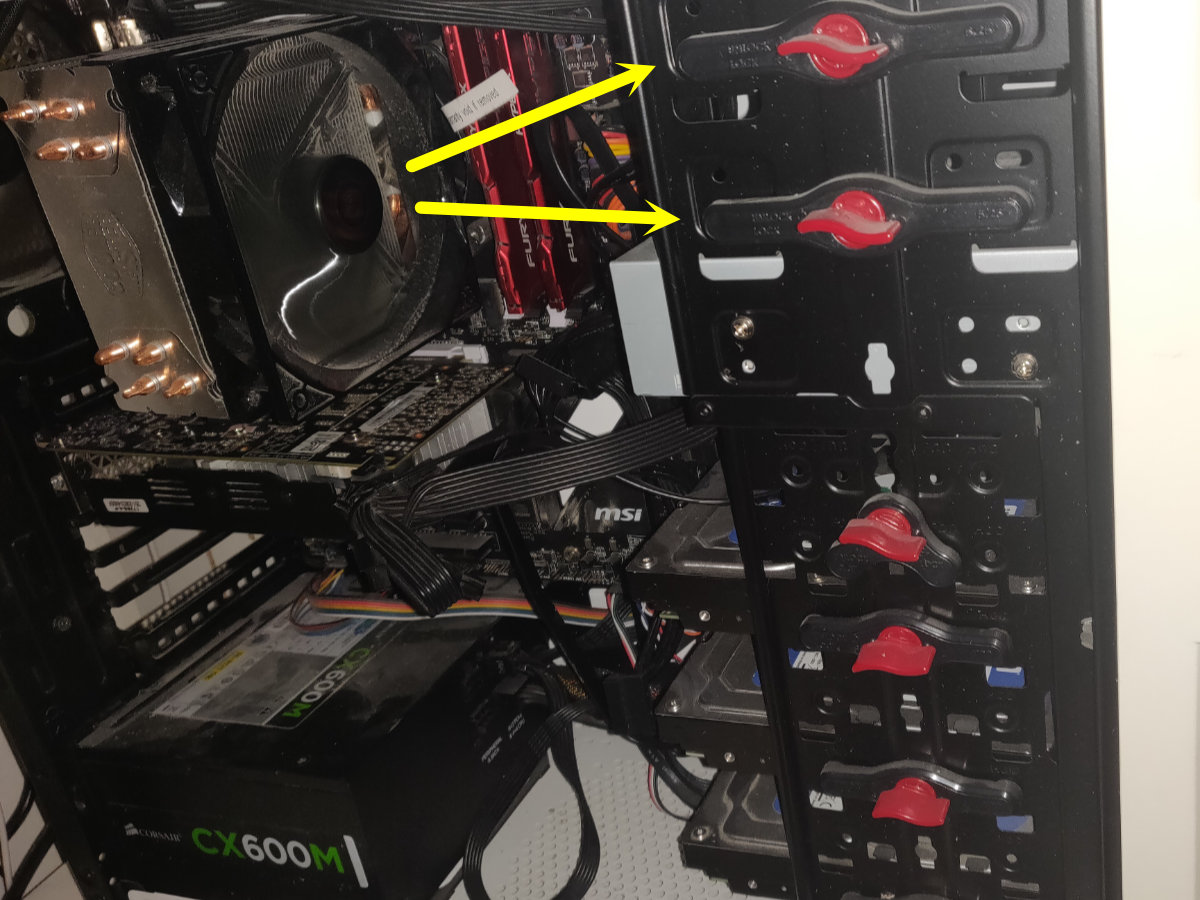
Since the laptop hard drive is so much smaller than the desktop drive, it can’t be properly mounted and locked within the desktop system unit case. A specific mounting bracket for 2.5-inch drives is required to install a laptop hard drive into the desktop computer.
Some computer cases may have a slot for installing and attaching 2.5-inch hard drives right out of the box. These are often found near the top of the desktop case, sometimes where a floppy drive might have been in the past. The image to the right may give you a clue as to what to look for – the yellow arrows show where a 2.5″ drive may fit.
Installing a laptop hard drive into a desktop is then a simple process of;
- Turn off the computer and once it’s shut down properly, unplug it.
- Take off the case – usually just a side panel.
- Locate the 2.5″ drive bays.
- Place the laptop hard drive into a free 2.5″ drive slot
- Attach the SATA data cable to the data port on the drive
- Attach the SATA power cable to the power port on the drive
- Plug the computer back in, turn on and test.
- Switch off again and secure drive into chassis – assuming everything works
If it’s working correctly, your laptop hard drive will appear in the drive list after the operating system has booted. If this did not occur after the boot process, you would need to check if the disk is loaded in BIOS.
How To Use USB To Link A Laptop Hard Drive To A Desktop Computer?
You can connect a laptop hard drive to a desktop computer using a USB connector. Connecting this way eliminates the need to open up the system case. There are a few options, but we’ll go through the top three in this post.
Using A USB Adapter
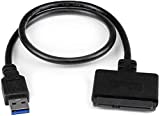
Special adapters that allow you to attach a 2.5-inch hard drive to a USB connector are easily found in any computer store or on Amazon. SATA and power connectors are still present on these adapters. If your computer has USB 3.0 ports, it’s a good idea to get a USB 3.0 adapter so that the hard drive can run faster when attached externally. The difference between USB 2.0 and USB 3.0 is quite staggering for hard drive speed.
The adaptor to the left/above is very similar to one I’ve used myself – and still do on occasion. It is a USB3 to SATA connector which enables you to use a laptop hard drive in a desktop computer without the need to open the case or even unplug it.
Connect the SATA end of the cable to your disk drive and then plug in the USB3 plug to the computer. You don’t need to switch the power off. Your computer should see the drive within a few seconds. And if you’re using USB3 the speed should be really quite good.
Using A Removable Case
This method is pretty much identical to the previous one, but you use a complete case to attach your laptop hard drive to your desktop computer instead of an adapter. SATA and power connectors can be found inside such a case.
After you do that, all you have to do is plug the hard drive into the case and attach it to the device with the USB cable.
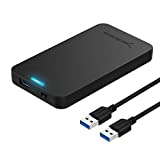
A removable case allows you to mount your hard drive to your device while still protecting it from damage if it falls down or gets anything spilled on it. Keep in mind that while choosing a case, make sure it is made for 2.5-inch hard drives, as cases for full-length 3.5-inch computer hard drives can also be found in computer stores. The larger cases, which house desktop computer hard drives, generally require a separate power supply whereas the 2.5inch laptop size cases generally are powered by the USB port.
The image to the right (above on mobile) shows a typical hard drive enclosure. Notice how you cannot see the disk drive at all. It’s completely enclosed and safe from the elements such as dust, moisture and to a limited extent, dropping.
The Sabrent is an enclosure I’ve used myself and it’s very good. The speed is good, it’s reliable and my one even had an on / off switch on it so I could switch the disk off to conserve power.
These can be used on a laptop too to give you some extra disk capacity in a portable package. If you use an SSD inside and have USB3 then the speed is really very good.
Using A Docking Station
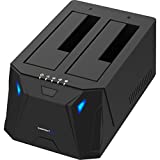
A docking station is the most intriguing and costly choice, best suited to users who frequently attach hard drives to computers. Docking stations are also available, which allow you to attach several 2.5 or 3.5-inch drives at the same time. Some docking stations allow you to attach multiple hard drives of various sizes at the same time. Some docking stations come with IDE connectors and SATA (though most are SATA these days) and allow for hotplugging of the disks. This means you can usually plug in the drive without rebooting the computer.
The image to the left (or perhaps above if you’re on mobile) shows a Sabrent dual bay USB3 SATA docking station. Notice how it has the two slots and then some plastic around it. The two slots you can see are 2.5″ laptop drive sized holes and the plastic flaps can be pushed down and out of the way when you instead insert a desktop sized 3.5″ disk instead.
Do note that these devices will definitely require external power and they’re not as portable as the devices listed previously. However, they are much more flexible and if you’re often asked by friends or relatives to recover data from a laptop or desktop these can be really good.
They can even be used to copy data from one external drive to another external drive since they provide space for 2 drives to be mounted at once.
Conclusion
Here are the most straightforward methods for connecting a laptop hard drive to a desktop computer. If you have to deal with this on a regular basis, you can invest in a dedicated docking station. It’s easier to disassemble the case and link the hard drive inside so that it doesn’t occupy one of the USB connections if the laptop drive has to be permanently mounted in the system unit. Generally, mounting inside the case will be faster and more stable, but will require more technical skill. Of course it’s also less flexible if it’s permanently mounted.
If you have any comments or questions please leave a comment below and ask and I’ll do my best to help. Thanks for reading and I hope this post has been Most Useful for you!
Featured Image by Andre Tan on Unsplash (cropped to size)


