Install Artix on VULTR (with Runit)
If you’re looking for how to setup Artix on VULTR this is how to do it – step by step from start to finish.

Last Updated: January 11th, 2022
By: Steve
The following is the steps I took to install Artix Linux on VULTR with Runit. I followed the wiki instructions mostly – though they’re a little cryptic in places and jump to different documentation. Which is fine, their documentation is not meant to be a step by step guide.
Before you do this, make sure you’re prepared for some headache. Artix is excellent and well worth the effort – but it’s not Ubuntu, or Fedora. You will need to roll up your sleeves and get dirty on the console.
So without further ado, here’s how to do it 🙂
Why Artix On VULTR?
Before you carry on reading, you may not be aware of why you’d even want Artix on VULTR. I’ve only just started playing around with Artix on WSL in the last few weeks. I’ve since switched one of my home media servers from Ubuntu Server to Artix and I’m now considering switching all my web hosting servers over to it.
Why? Because it’s lean and mean. It’s quick. It’s fast. And it’s old school. I grew up on Linux in 1993, when it was hard work. Artix is not hard work, but it won’t hold your hand on a lot of stuff like Ubuntu will. But Ubuntu’s trade off for that is that it installs a LOT of stuff you’ll never actually need or use. Just in case. Like Windows does. Artix doesn’t do that.
And I’m not against SystemD per se. OK, I don’t like SystemD but I’m not specifically against it. I find it cumbersome. I find it annoying. One of the first things I do on any Linux install that has SystemD (and I only just realised I didn’t have to use a distribution with SystemD) is to turn off the bloody systemd-resolved. It gets on my proverbials. Turn it off, modify /etc/resolv.conf – job done. Why the hell do you need name-service processes running automatically changing your name look ups?
Because it makes it simple for normal people. But it slows it all down and over-complicates it for those of us who can get to grips with a console and a text editor.
Anyway, I rant. I don’t like SystemD and the interwoven bloat it brings. So, I now choose Artix 🙂
Create a New VULTR virtual server
To begin with you’re going to need a VULTR account if you don’t have one already. It’s worth noting that you don’t need to install Artix on a VULTR server – you could use DigitalOcean or Hetzner or another VPS provider if you choose to – but I use VULTR and have done for years, so that’s why I’ve written this specifically for VULTR.
If you don’t have a VULTR account already you can get $100 credit for 30 days to play around and try it. Click the link here to get the $100 credit.
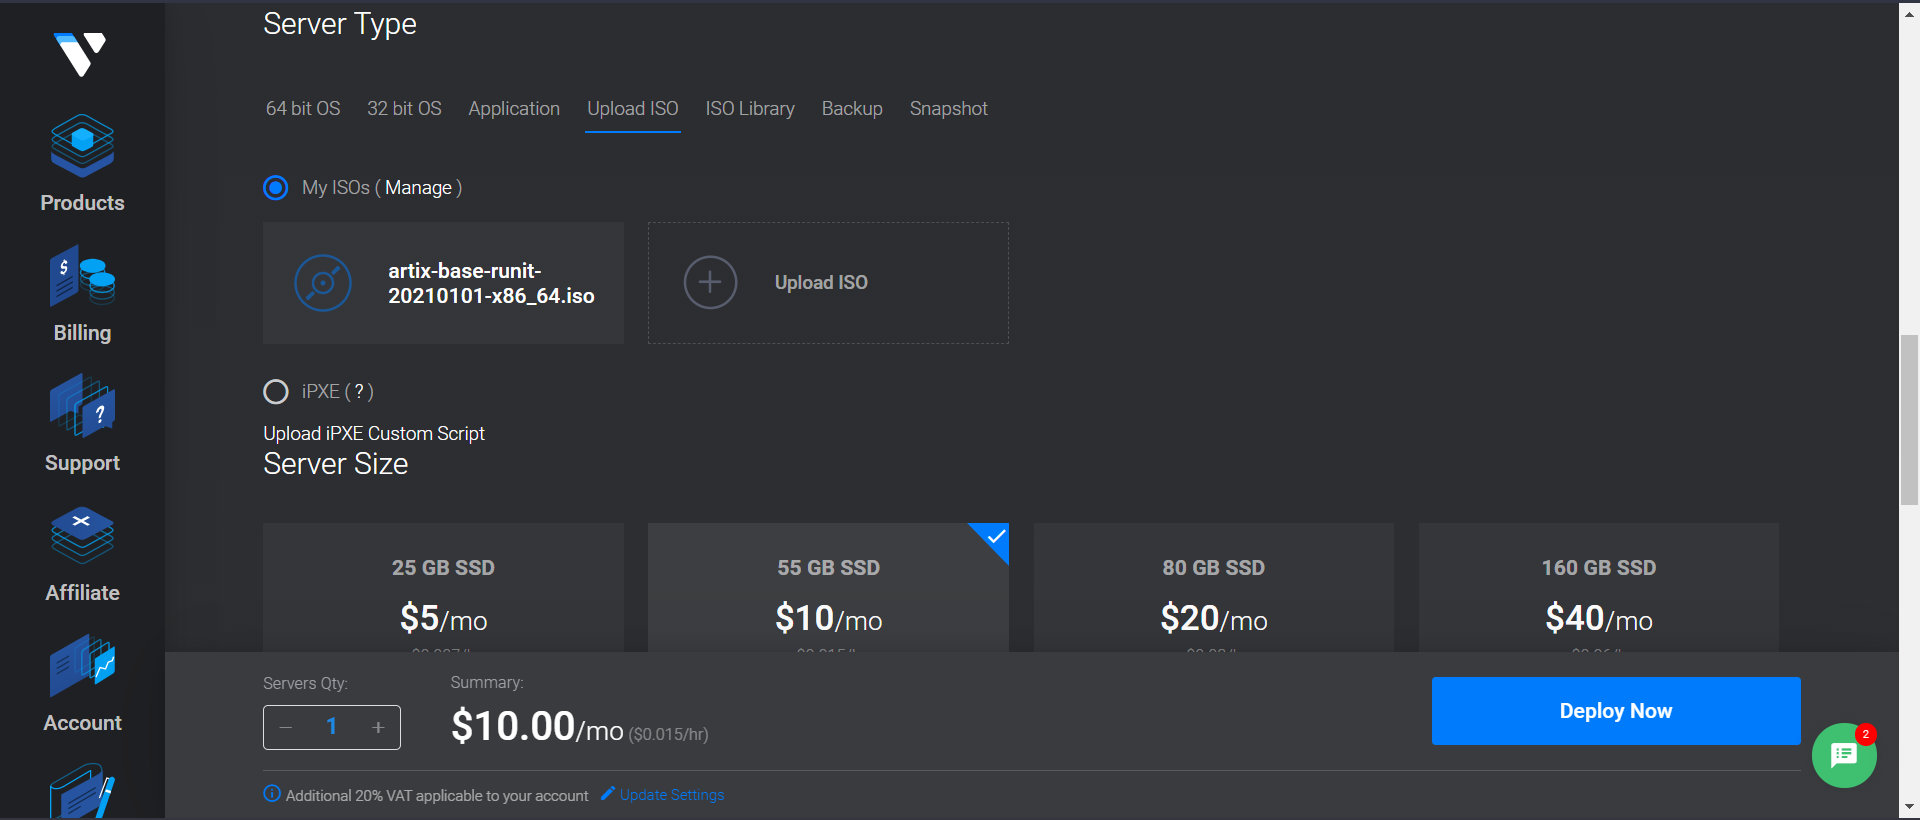
If you have an account already, click Deploy New Server. Then choose your type of server (I recommend a simple Cloud Compute instance). Then choose your location. Then for server type, choose Upload ISO. Once you’ve chosen the location of the ISO (details below) you can choose the size of server you want. The $5 server is perfectly adequate for playing with.
Choose Upload ISO
Find the location of the ISO that you want to use from https://artixlinux.org/download.php – Make sure you choose a BASE ISO, not any of the others as they have GUIs installed that you probably don’t want on a VULTR server. Right click and copy the link address. You’ll need it in the next step.
Give the URL of the base runit ISO from Artix. You can of course choose to use OpenRC or S6 if you prefer – but these instructions are Runit specific.
The details of this tutorial are taken from https://wiki.artixlinux.org/Runit/Installation with some tips for using it on VULTR. I have written this tutorial for use with VULTR and to put all the information in one place – not to attempt to rip off their hard work.

Start Artix and Login
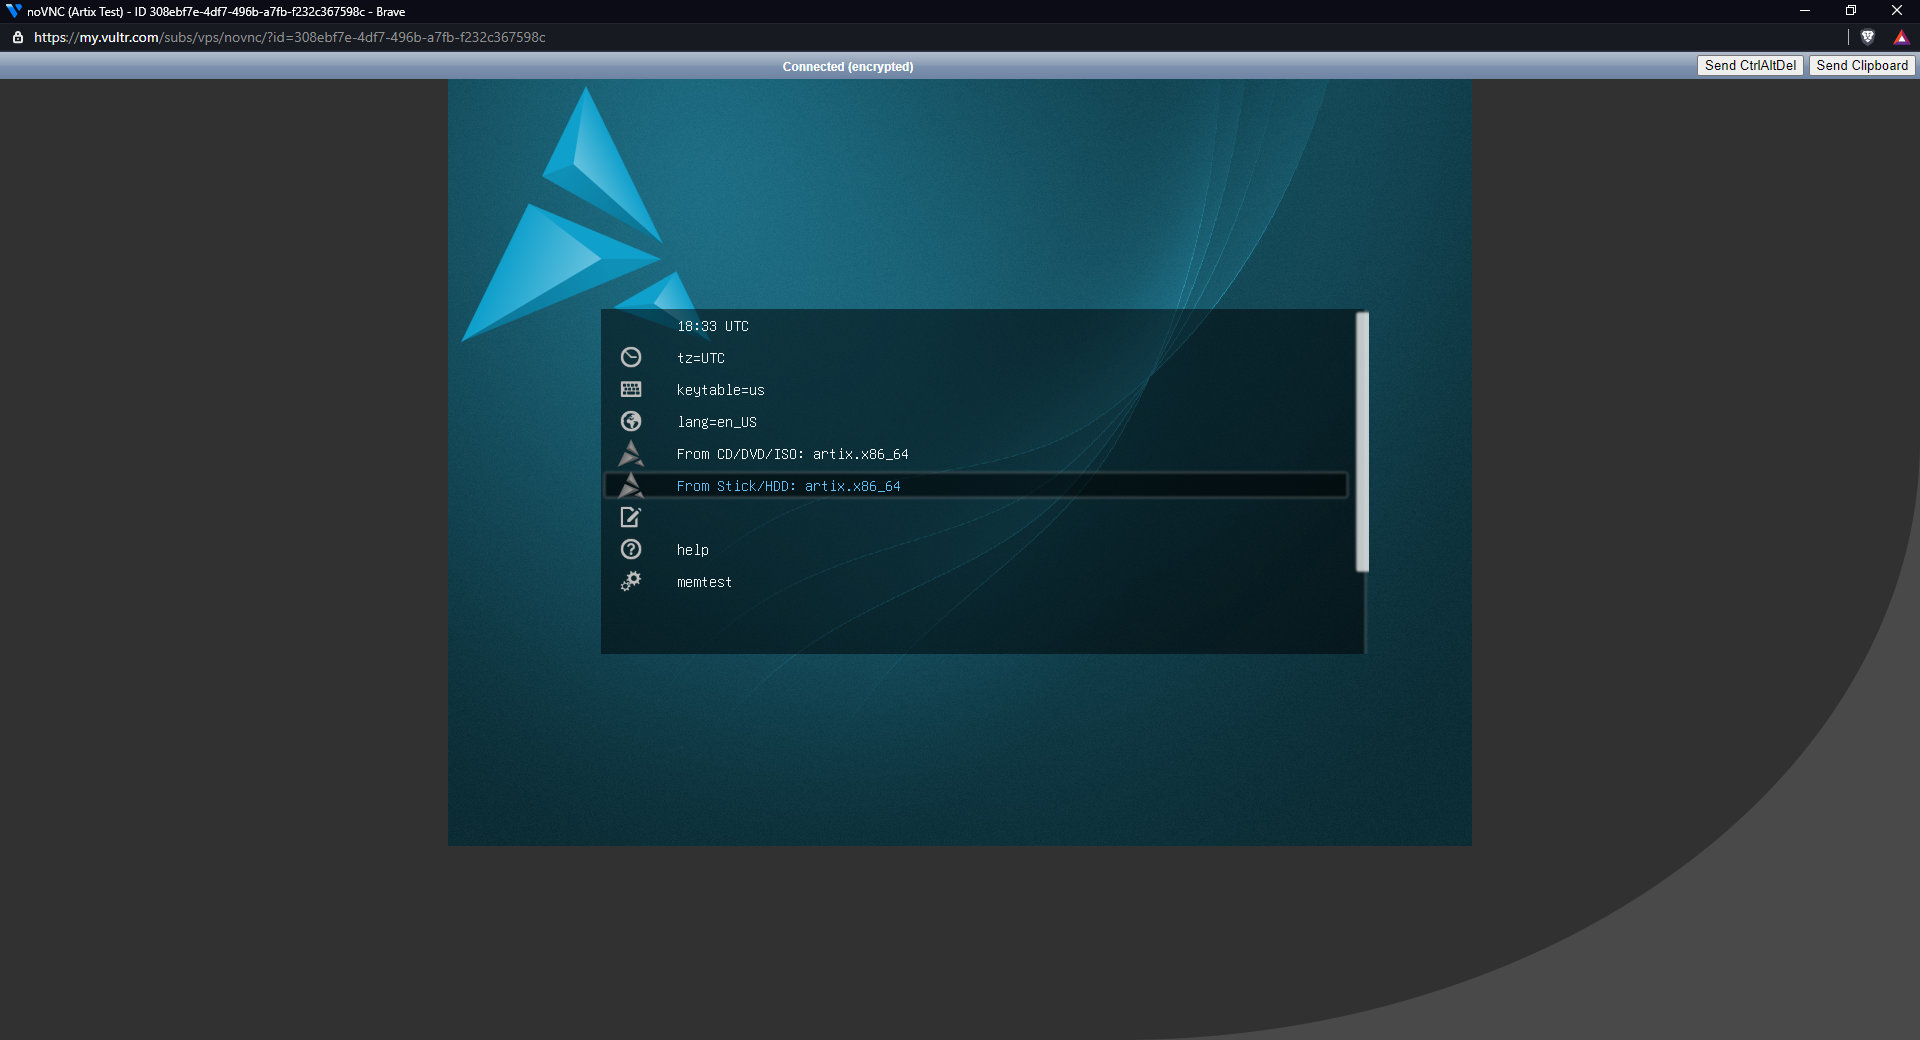
Once your virtual server is installed it will be running and waiting at the startup prompt for the Live ISO. You’ll need to use the VULTR console to interact with it because at this point there is no telnet or SSH available. Indeed, at this point there is no networking available as Artix hasn’t actually started.
Choose the options that make the most sense for you for keyboard layout and locale. Then choose to boot Artix from HDD/ISO and await the login prompt.
Login using artix for the username and artix for the password.

Check Connection To The Internet
Artix should start up and automatically configure the ethernet connection. You can confirm that it has done that by typing
ping artixlinux.orgYou should see some output that suggests the ping is working.
[artix ~]# ping artixlinux.org
PING artixlinux.org (172.67.169.87) 56(84) bytes of data.
64 bytes from 172.67.169.87 (172.67.169.87): icmp_seq=1 ttl=58 time=8.88 ms
64 bytes from 172.67.169.87 (172.67.169.87): icmp_seq=2 ttl=58 time=8.89 ms
Get Admin Privileges
In order to configure the rest of the system you’re going to need to be the ‘superuser’. This is the user that has ultimate power and can make or break a system. So we don’t normally login as this user because it’s dangerous. But in this case it’s necessary.
sudo -sYou probably won’t need to give a password here because the Live ISO is expecting you to have to become the super user anyway – but if you do, it’s artix – the same as you entered initially to login.
Be warned – you now have the ultimate power. Use it wisely 🙂
Partition the Hard Drive
Depending on which VULTR server you choose you may find that your disks don’t look the same as mine. I have set mine up on a cloud compute instance, which if you do the same, you should be able to use the same device name as I have. If you have something else on VULTR then you may need to change the device name.
To find out what your hard drive device is called do the following;
fdisk -lIf you’ve got the cloud compute instance then it’s probable /dev/vda – but it may be something like /dev/nvme
Once you have the name of your device, do the following;
fdisk /dev/vdaYou can then create a new partition by pressing ‘n’. It will default to using the whole disk for the partition if you just press return at the questions. This is suitable for a VULTR server as you do not need any other partitions. Once you reach the fdisk prompt again, press ‘w’ to write the changes and exit fdisk.
Format The Partition
Once we have the disk partitioned correctly we need to put a file system on it. In our case we’re going to use EXT4 – although others are potentially available I have no idea about file systems such as BTRFS so I’m not going to look at that yet.
mkfs.ext4 /dev/vda1Mount The Filesystem
Once we have created a file system on the drive we need to put some software on it. In order to do that we first need to mount the disk.
mount /dev/vda1 /mntAgain, if your drive was called something different when you initially looked, you’ll need to use that instead. It might be /dev/nvme0p1 or something similar. If you used Cloud Compute it’s probably /dev/vda1 though.
Install The Base System
Now that we have a disk set up, we can install the base Artix system. This is a minimal installation from which we can later reboot and install all the other packages we might want.
basestrap /mnt base base-devel runit elogind-runit linux dhcpcd dhcpcd-runit openssh openssh-runit grubdhcpcd and dhcpcd-runit are not mentioned in the Artix documentation which can leave you floundering a bit later. But these packages are needed on VULTR to automatically configure the network from their DHCP servers. We’ll have to set them to autostart later because we can’t do that just yet even though the basestrap command will give us a hint that we should. Ignore it for now, we’ll do it later.
Create an FSTab
Linux automatically mounts the various disks after a reboot by consulting the /etc/fstab (file system table) when it’s booting. In order to get everything up and running after a reboot we need to create that now.
fstabgen -U /mnt >> /mnt/etc/fstabThe -U parameter tells fstabgen to use UUIDs for the devices instead of labels. If you want labels instead, replace the -U with -L. I prefer UUIDs though – but can’t really say why 🙂
Configure the System
We’re almost ready to reboot into the new system – but we have a few bits to set up first. To do that we’re going Change Root to the new system. The chroot command is used to do this and it essentially makes any commands after it’s invocation think that they’re working on a different disk to what they originally were.
artix-chroot /mnt /bin/bashThis will make your mounted drive appear as it will appear when it’s been rebooted.
Set Network Configuration
On VULTR it’s recommended to use DHCP to assign the network interface its IP address and details. It makes configuring it all considerably easier. And it’s pretty straightforward to set up in Artix but you must do it before you reboot from the Live ISO. To set up DHCPCD do the following;
You will need to edit a file – install your favourite editor using pacman too. I use joe (install it with pacman -S joe).
joe /etc/runit/sv/dhcpcd/confUpdate the line that says OPTS=”” and change it to OPTS=”eth0″
That should be all you need to get your networking to start after a reboot.
Set The Time Zone
Linux likes to know which timezone you’re in so that it can make log files and timestamps and so on reflect the actual time you performed them. To set the timezone issue the following command;
ln -sf /usr/share/zoneinfo/<Region>/<City> /etc/localtimeIn my case I am in Europe/London so I replaced the <Region>/<City> with Europe/London
Set The Root Password
You need to set a more sensible root password. Particularly since currently no root password is set.
passwdInstall A Boot Loader
We’re almost ready to reboot but before we do, we need to install a bootloader. This is a special program which tells the VULTR server how to start your operating system.
We’re going to use GRUB for this. We’re also going to follow the Master Boot Record instructions because VULTR servers don’t appear to support EFI – but I could be wrong about that. This is what worked for me though.
pacman -S grubConfigure the Boot Loader
There’s really not much to do to configure the boot loader as the defaults work quite well. But you will need to actually go through the motions otherwise your VULTR server will not reboot and you’ll have to use the ISO again.
The necessary defaults and files are automatically installed by Artix when we set up the base system. So to configure Grub just issue the following command;
grub-install --target=i386-pc /dev/vda
grub-mkconfig -o /boot/grub/grub.cfg
grub-install --target=i386-pc /dev/vda
It is not a typo that the grub-install command is listed twice. For some reason, if you don’t run it again after you have made the config file then your server will not reboot properly. And you can’t make the config file until you have done a ‘grub-install’ first. So you have to run it twice.
Don’t forget, if you installed a different VULTR server type then you may need to replace /dev/vda with something like /dev/nvme0 or something ultimately quite different.
If it worked, you’ll see output that says ‘Installation finished. No error reported’.
REBOOT
Finally we should be in a position to reboot. It’s taken a while but here we are. But hold your horses – we don’t want to just type reboot like we might normally to reboot a server because the Live ISO is still plugged in to our VULTR server.
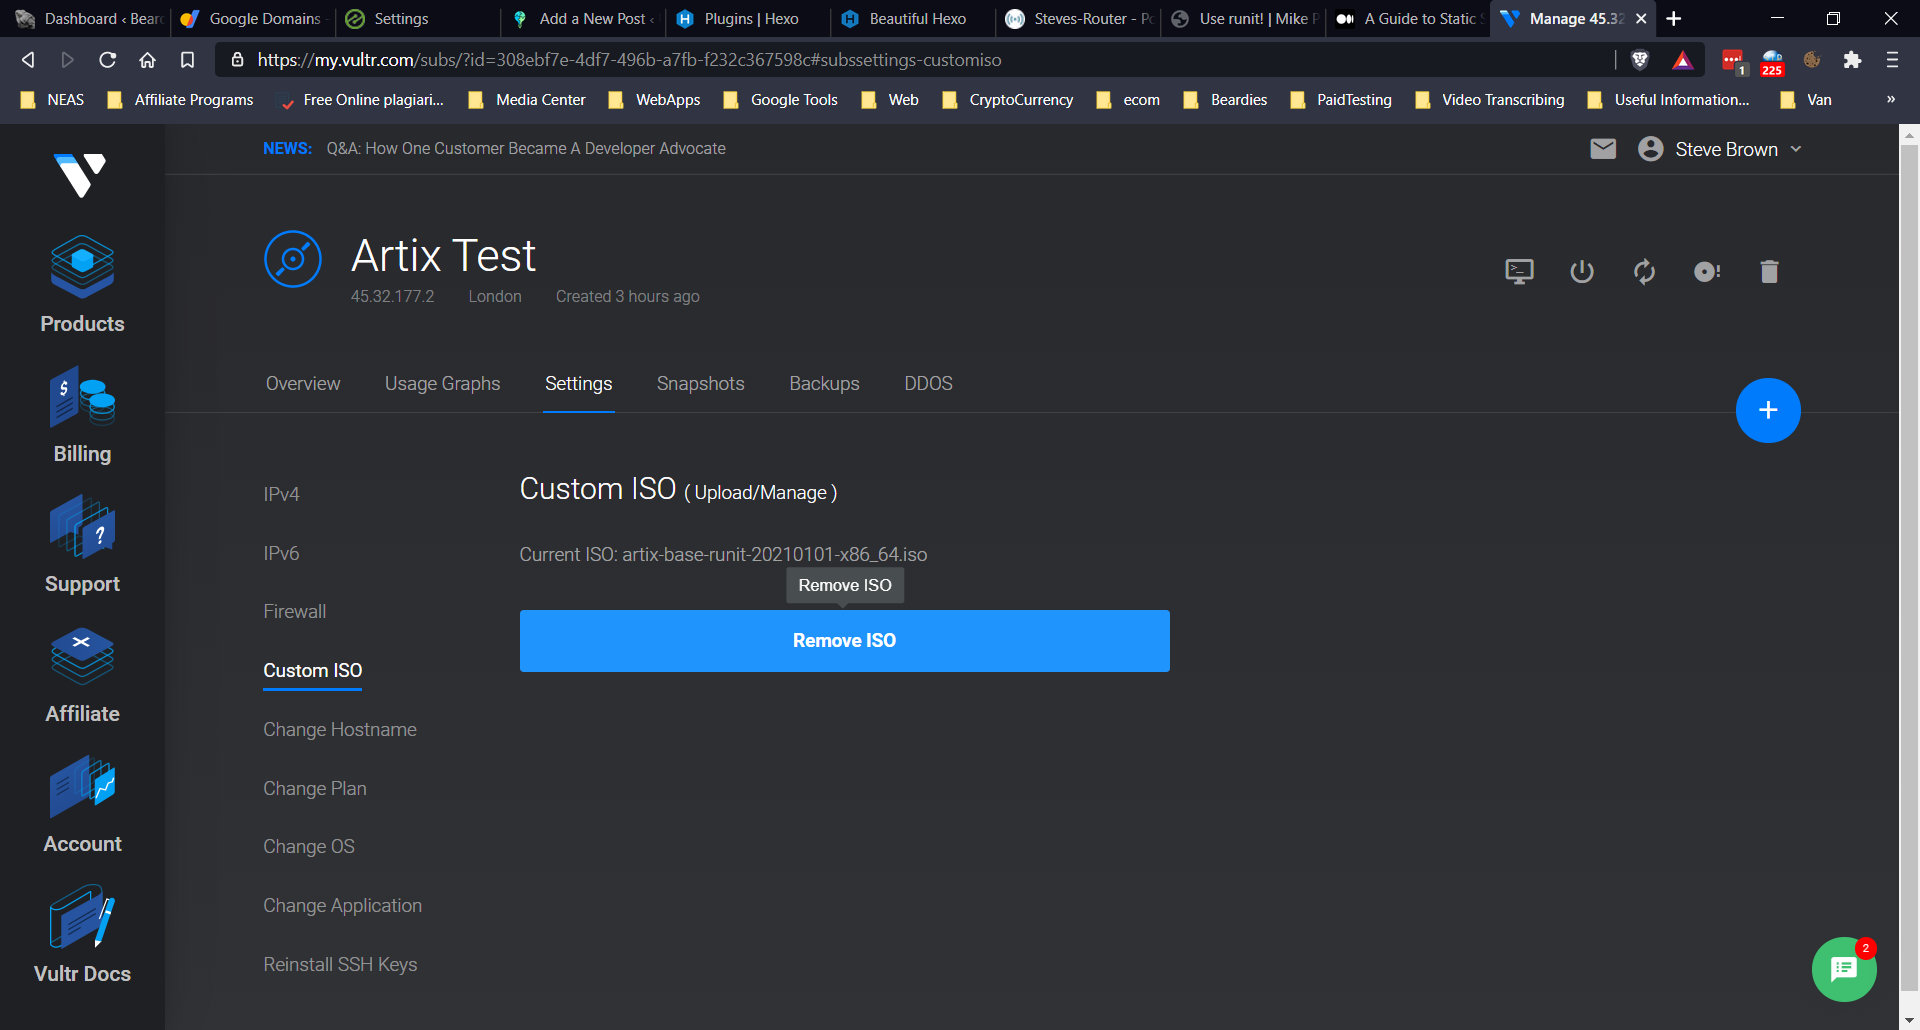
You’ll need to go to the settings for your new server on the VULTR dashboard and choose Custom ISO from the menu on the left. The click the big blue button that says ‘Remove ISO’. Do note that this is only removing the ISO from the virtual server, not your ISO library.
If you’ve followed everything so far, your new server should reboot and be waiting at the login prompt for you. You may need to close the Console browser window and re-open it to see the rebooted machine.

Finalise Setting Up Artix on VULTR
Login To The Console With Root
Log back in once your server has rebooted (and it’s quick by the way – there’s no SystemD here slowing it all down!)
Log in as root with the password you set up above.
Set DHCPCD and SSH to Run On Boot
Earlier we installed DHCPCD and OpenSSH, but they won’t start automatically when we reboot.
Artix package installations don’t set services to run automatically by default, so we need to do that. Fortunately with runit it’s really easy.
ln -s /etc/runit/sv/dhcpcd /run/runit/service/
ln -s /etc/runit/sv/sshd /run/runit/service/
Once they’re added to the current run level, we can start them with
sv start dhcpcd
sv start sshd
You should then find that your new Artix boot can talk to the internet again.
Create a Non-Root User
Although we’ve started an SSH server, you won’t be able to login because there’s no users on the system yet and SSH won’t let root login. To create a new user issue the following commands;
useradd <username>
passwd <username>
groupadd sudo
usermod -aG sudo <username>
mkdir /home/<username>
chmod <username>.<username> /home/<username>
Obviously replace <username> with whatever username you want.
Allow Non Root User to Become Super User
Your account you just created will want to be able to become the super user so you can continue to set up your system. The VULTR console is handy, but cumbersome. You’ll almost certainly want to SSH in instead. And since you can’t SSH in as root, you’ll need to become root once you’re in.
To allow a non root user to become root – or run root administrative commands – you need to uncomment the line in /etc/sudoers that looks like
# %sudo ALL=(ALL) ALLSecure Your SSH
It’s worth setting your SSH server to only allow logins with a private/public key that is recognised. This stops people from trying to guess your password because no matter whether they get it right or not, they’re not getting in with SSH unless they’ve got your private key.
I’ll leave that as an exercise for you to look at how to do it – Google will be your friend 🙂
And That’s a Wrap
You should now have successfully installed Artix Linux on a VULTR server. No more needing to setup Ubuntu, Fedora, CentOS, Debian or any of those SystemD infested systems to run your servers any more.
The boot time of Artix on a VULTR server seems to be about 4 seconds. From start to login prompt. You won’t get that on Ubuntu – not even close.
And Artix is absolutely not as hard to set up and maintain as people would have you believe. It’s based on Arch Linux and Arch has one of the best documentation systems available, which can help you continue your journey.
And for a server – webmin and virtualmin appear to work on Artix as well, which I shall be investigating shortly. After further investigation, webmin is available for Artix in the Pacman repositories, only recently uploaded but Virtualmin is not. However, it’s not really much use for running any kind of web hosting service as you really need Virtualmin for that. It does provide a bit of server management though. I may well look at how I can help improve that as time goes by.


